Wednesday, January 30, 2013

DIY Matte Lipstick


Let's talk LIPS!

SO what do you do if you are on a budget and you are obsessed with matte lipstick, or you just already found your perfect red shade, you just wish it came in matte as well? Well then hopefully this video below will solve all of your problems!

Oh and something else that's great, mattifying your lipstick also makes it last much longer. It's perfect if you are going into a situation where you probably won't be able to re-apply for a while.
 
Before you watch the video, please excuse the rampant mess and dissgusting walls...I know I know, it's gross, I'm so sorry, please just ignore it! Enjoy (-:


ELF High Definition Powder here.
Revlon Just Bitten Lip Balm/Stain in Sweatheart here.
 
If you want to make your own lip plump you can look at my post on DIY Lip Plump here.
No time to make your own lip plump?
I also use Salley Hansen Vita-C Lip Plump which you can get here. I got it at Walgreens for $4.
 
Also, if you made your own Mineral Veil/Face Powder from my post here, you can also use that to mattify your lipstick.
 
In my matte post I talked about the NARS Lip Pencil in Cruella. This is a great blue-red and looks especially nice against light skin. NARS also has other great matte colors in this same lip pencil. You can check them out here. Below is a picture of the NARS in Cruella.
 
I know I know, I'm sooo white.
 
 
I also love love love Tarte's LipSurgence because it's like the Revlon Just Bitten. It is a lip stain and a balm in one AND it's MATTE--at the same time!! SOO awesome!
 BUT the Revlon Just Bitten Balm/Stain is around $7 while the Tarte stains are more pricey like the NARS, both being around $24. You can check out Tarte here. WARNING: You will be tempted to buy all of the colors!


Sunday, January 27, 2013

Hollywood Secrets or Aztec Secrets?


Soo this product sounds promising.
Supposedly it is a "super-clearing mud mask" that vacuums out everything in your pores and can also be used as a spot treatment, literally sucking out pimples. Kind of gross but it gets my attention.
Want to see the vacuuming action? Take a look at this picture...
 
 
All of those little bubbles are said to be the gunk being sucked out of your pores.
 
The only problem? It's $69!
Needless to say I am definitely on the fence when it comes to buying this product, I need to be sure it is as awesome as it sounds before shelling out that kind of cash.
 
I have read all of the Sephora reviews, and honestly, I have never seen so many five-star reviews for one product. I think pretty much every single person gave this product five stars except for maybe one person. You can check it out for yourself here.
 
This mask came out of Hollywood and one of the big fusses about this product is so many movie stars swear by it. It is packed with tons of good ingredients for your skin and it utilizes this new PORE-MATRIX™ technology saying:

"NEW PORE-MATRIX™ Our Activated-X Charcoal is an Xtreme absorption carbon, attracting toxic substances into its mass up to 500 times its volume from all skin types, within the deepest & toughest areas. Our new proprietary K17-Clay™ will better extract & encapsulate excess sebum oils, bacteria & toxins in a controlled stasis state, revealing a Pore-Matrix™ of extraction dots & areas, ready to be washed away for seemingly poreless skin."
 
If you want to read more about it, please visit Ivory and Olive's review on this product here.
They go into even more depth about the ingredients in this mask and how it came about.
 
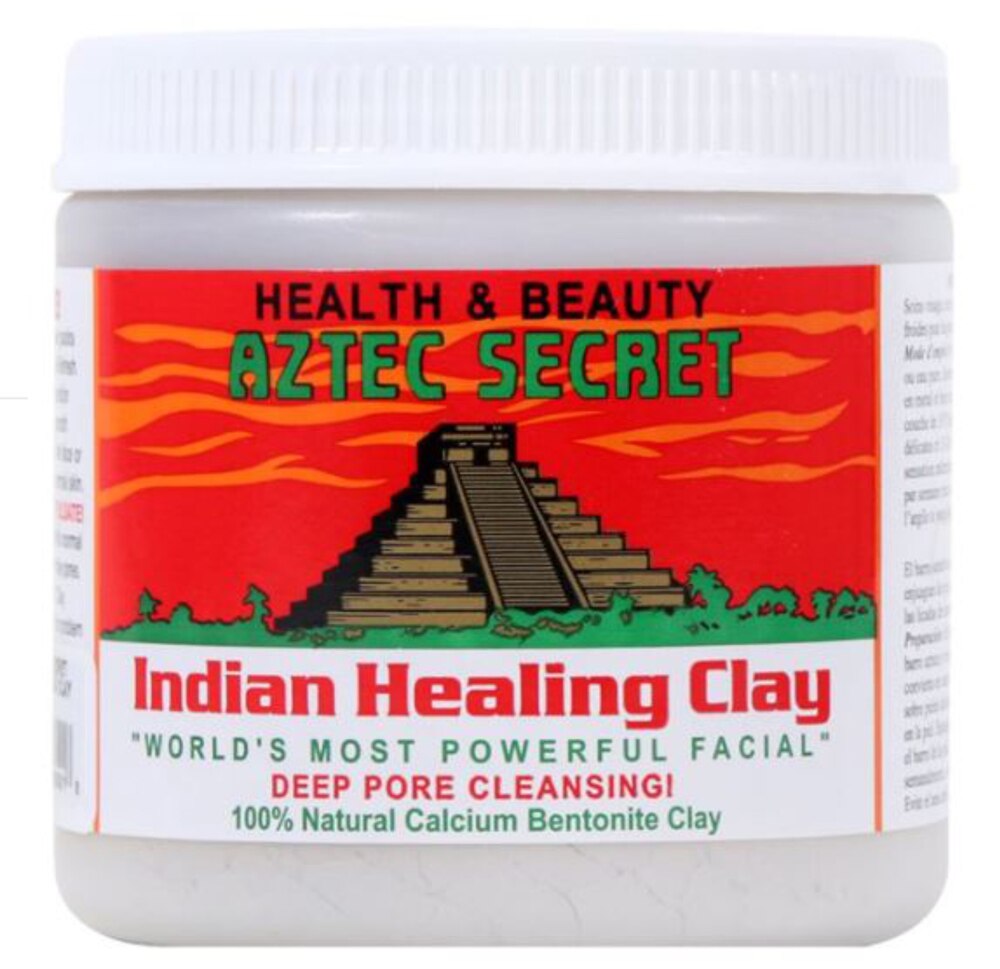
Now, one reason I really really hesitate to go grab this product, even the sample which you can check out here,  (even the sample packets are a lot of mulah), is because I use this super magnetic Aztec Secret Indian Healing Clay mask that suctions everything out of my pores. It deep cleans and detoxifies and also improves circulation to your skin. The best part? It is only about $6 for a huge 1LB jar of it! The GlamGlow at $69 per jar is not even one pound.
 
 
I usually mix some of this clay with some raw apple cider vinegar (which works wonders for skin even on its own) and put it on my face and back until it dries completely--you will know when it is dry because the skin on your face is being pulled by the mask. It works wonders. It detoxifies and clears and heals.
 
It does not, however, contain all of the wonderful ingredients that GlamGlow clay has, but it is natural and it works, so do I really need all that extra stuff in the GlamGlow mask?
 
I mean, it does sound enticiing, but I am not sure that it is really necessary to drop $69 v.s. $6 if the difference in results are not going to be that huge.
 
Most of us really have no choice--we simply cannot afford the $69 little jar of supposed skin miracles. If you are in that boat, then definitely try this Indian Healing Clay. I think that it is a great, very cheap alternative/substitution for the expensive stuff.
 
This is the back of the jar.
 
 It is normal for your skin to be a little red or flushed for about a half hour after you use it, but a week goes by and suddenly your skin it starting to looking glowy and clear.
 
If you have really sensitive skin, do not mix it with raw apple cider vinegar, mix it with water instead. You choose the consistency of your own mask--how thin or thick you want the mask to be, the ratio of water or vinegar you use to the clay--thin masks will be a little more gentle.


You can find this Indian Healing Clay at really any health store around. I have even seen it in a few drug stores like CVS. I get mine at Sprouts but I am sure they have it at places like Whole Foods and New Leaf. If you cannot find any near you, you can order it online here. Here is also a link to the organic apple cider vinegar I use by Bragg.
 
Don't buy this jar for more than $8 on Amazon, that would be a rip off. I bought my jar for only $4.95 at Harvest House on Monument in Concord, CA.


Hope this helps for all you ladies on a budget, yet drooling over those little jars of GlamGlow like me!


Tuesday, January 22, 2013

Blemish Powder

EyesLipsFace (ELF) has this Mineral Blemish Powder that I use every single day. It is awesome.

On the actual ELF site this product has mixed reviews, like most products, but I personally give it five stars. It in no way claims to be a concealer, so it doesn't have a lot of coverage and is very sheer. BUT it fades pimples and makes them less red and it is perfect to wear underneath any foundation/concealer. I feel like it almost creates a pimple-fighting barrier between my skin and my foundation when I wear it.


Sometimes if my skin is looking pretty good, or I am camping in the summer, I will wear it alone. It goes on looking very natural.

Best part?
It has TONS of awesome ingredients in it that give your blemished/acneic/oily skin great benefits.

Kaolin soothes irritated and blemished skin and helps to heal.
Willow Bark helps prevent acne and naturally contains salycilic acid.
Tea Tree Oil is an anti-bacterial and keeps pores clear of dirt and grime.

You can get ELF Mineral Blemish Powder here.

One of the great things about the ELF website is that every product has a video to go along with it. It shows you how to best use the product and also gives you a full list of ingredients.

Do I sound like a walking ad for ELF? Sorry!
But I have found that being a girl on a budget, ELF is such a great website because everything is just so dang cheap compared to other places. You get the most bang for your buck! Target carries some of their stuff, and sometimes so does Grocery Outlet, which is nice because then you don't have to pay for shipping, but sadly, I have not found the Blemish Powder in Target yet.

Anyways, pretty much all of the beneficial ingredients in the ELF Mineral Blemish Powder, you can use to make your own really great acne-fighting concealer. Refer to my post here. And also here for more info on the ingredients.


The one thing that the ELF Blemish Powder has that I don't use is Sulfur. Sulfur is beneficial for acne-prone skin, but not great for sensitive skin because it can be very harsh and irritating.

Hope all is well!

Monday, January 21, 2013

DIY Matte Nailpolish


Ingredients:
1) One bottle of clear nailpolish (.45 fl oz/13.3 ml)
(I used NYC Long Wearing Nail Enamel #271 topcoat--cheap, only $.85 at Target!)
2) 3 1/2 tsps of cornstarch


As you can see, I made a mess. It is impossible not to! So, learn from my lesson and don't do it on the carpet like me, although, I have to admit, doing it on the carpet was a stupid thing to do in the first place.
 
The results were not what I expected, and I would recommend shelling out the bucks and buying a matte topcoat instead of trying to make one. Here is the one I usually use.


It turns out that the cornstarch clumps and balls up in the nailpolish as you add it in, so each time you add a little bit, you have to stir it around really well with the nailpolish brush.
 
After a little while the cornstarch will settle to the bottom so you have to shake it up.
 
The mattifying effect works alright after you add enough cornstarch. The cornstarch also makes your nailpolish dry a lot faster. So I guess you are kind of killing two birds with one stone.
 
 If you want to make your own quick-dry top coat that still has a shine to it, add only one tsp of cornstarch to your clear nailpolish.


The color I used to start out: Sinful Colors in Innocent (#944).
 
I was trying to take pictures of before and after, but it is really hard to see the mattifying effect. The picture at the top is an after picture if you want to look and try to compare. You can tell that the polish doesn't shine as much in the first picture as it does in the pictures directly above. 
 
Bottom line, if you are looking to quickly mattify...or dry...your nails, the answer is yes, cornstarch works, after much effort and work, and the best thing is that if you have an old clear nailpolish lying around and some cornstarch in the cabinet, and you are pinched for time, it is a lot cheaper and quicker than going to the store to buy a matte topcoat.
 
One other aside is that people also enjoy adding broken eyeshadow to their nailpolish to change the color slightly and also to give it a more matte color, or just dull the shine a little or add some sparkle. I have not tried this but maybe I will experiment and post about it later. If you have experimented with this I am sure we would all like to hear! Or if you do experiment with adding eyeshadow, let us know how it goes!
 
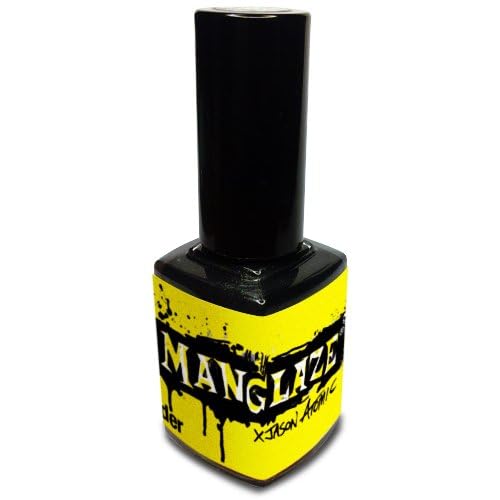
On another note, in my Matte post, I talked a little bit about ManGlaze. I LOVE this matte nailpolish and wish I could buy every single color, but it is kind of pricey. Here is a picture of the color "Fatty's Got More Blood". I swear that is the official name of the nailpolish, I couldn't make this shit up. It's a good vampire red and the matte finish gives it an edge.
 
 
This is only one coat. It becomes much a much deeper red as you add layers.
 
"Fatty's Got More Blood"
 
I will be posting again about DIY matte lipstick! Check back soon (-:


Friday, January 18, 2013

DIY Concealer Updated

Hey all, so I have updated the DIY Concealer/Foundation post. I was finally able to upload all of the pictures. You can check it out here.
I will be doing a DIY matte lipstick post as well as a DIY matte nailpolish post to follow up on my "Matte" post which you can check out here.
Happy Friday!!
Until next time, here is a photo I took on Mount Diablo last weekend.

Thursday, January 17, 2013

Matte

As I have gotten older, I have really begun to value a nice lip color without the intense shine that comes along with most lipsticks and always comes along with lipgloss.

My new obsession, matte lipstick.


This is my recent favorite--the perfectly sophisticated, bold red: NARS Velvet Matte Lip Pencil in Cruella.

This red has blue undertones which make it ideal for fair complexions.

This color is matte but it doesn't dry out lips or become cakey or crumble which I have come across with matte formulas before. Also, like most matte formulas, this stuff is definitely long-lasting and stays put.

Another matte obsession...matte nailpolish.


This color is called Matte is Murder by ManGlaze. You can visit their website chalk-full of all matte nailpolish in so many cool colors here. Not to mention, they have the coolest names for their colors--Matte is Murder? Fuggenugly? They also have artwork on all of their bottles cutomized to the color of the nailpolish inside. Pretty awesome and unique.

I will have pictures up sssooonn. In the mean time, you can check out the finished Matte is Murder here. It's a pretty good picture and it is exactly what the finish looks like.

Sometimes, it is just so much better to have a matte color on your nails. It can be classy when you have something like a job interview to go to and don't want your nail polish to be really flashy. It's also a good fix if you have a color that you like but it is just too bright for an occasion.

Here is an affordable, clear matte topcoat that I like. It can be applied to transform any color nailpolish into matte.

More to come on matte lipstick and nailpolish!

Monday, January 14, 2013

bareMinerals Review: To Glow or Not to Glow

I have no problem saving up for a little while to fork out more cash than I usually would for a product that is going to give me amazing results. This is why I always read every review I can find on every website I can find before buying a product as expensive as this one.

Now, it may not seem that expensive at only $35, but when you do the math...it turns out that without tax, each glow "pad" is exactly $.58. Uhh, that's a lot! that's over fifty cents per pad. So the question was, is it really worth it? Is it really as miraculous as all of the reviews say? I had to find out for myself.

bareMinerals Intensive Glow Pads (if you cannot see on the picture) say on the box, "advanced formula, for vibrant skin". Pssh! Hell yeah I want "vibrant" skin!

So I went all-in. I used these glow pads religiously every night for two months...without the crazy miraculous results that most of the reviews boasted.

What these pads did is really lighten my skin. I already have practically alabaster skin so it is hard to believe, but what I thought was impossible came true...my skin became even lighter! So if you are looking for a lightening treatment, these definitely do the job. The problem is that these pads claim to be a "brightening treatment" which in my mind is a little different than lightening. Lightening whitens your skin while brightening is supposed to give your skin a luminous appearance.

When you read the ingredients in these pads, it seems like a bunch of awesome exfoliating, acne-fighting, nutrient-rich, anti-oxidant and anti-aging products all rolled into one super-product that is free of synthetic dyes and other common ingredients that are not good for your skin. Lactic acid and glycolic acid are two of the main ingredients. Glycolic acid is great for acne and blackheads while lactic acid is a natural exfoliant that can be found in milk (which historically has been used as a luxurious skin treatment--great for at-home face masks...I will talk about this later). The pads also contain lemon extract which is great for acne as well as lightening skin tone.

The pads are actually pretty awesome. There is a bumpy side for more intense exfoliation and a smooth side. I would usually use the braided side first and then wipe the smooth side over my face. But both sides were great and felt like they were really exfoliating my skin.

I don't want to say that I am completely disappointed with this treatment, but it did not give the magical results I was hoping for. My skin was not much smoother than usual, I didn't break out less, and my skin had bouts of luminosity but that was not as intense as I had hoped. Mostly, it just made my skin even whiter than it has ever been before. Perhaps my expectations were just too high, which is always a recipe for disappointment.

Bottom line, if you are obsessed with being tan--do not use these on your face, it will erase signs of ever having been tan in your life. If you have mostly problems with oversized pores and not really any acne, this is probably a great skin treatment for you.

One little tip is that you have to leave your face alone for about a half hour or so after you wipe the pads on your face, then you can follow with moisturizer. But it takes a really long time for the tackiness to go away and the formula to sink into your skin.

Interested? You can get bareMinerals Intensive Glow Pads Brightening Treatment here and here.