Showing posts with label treatment. Show all posts

Thursday, July 31, 2014

Papaya Seeds

You know those black slimy seeds in the middle of the papaya? Those things you usually scoop out and throw away with a frown on your face because they remind you of fish eggs? Well, next time you cut open a papaya, consider keeping those fish egg-looking seeds and putting them to good use...say, in an awesome face mask...or in a healthy smoothie.


I often will use papaya in face masks as it is a natural exfoliator for skin. This fruit is full of enzymes which are great for the digestive system as well as for brightening your complexion and help improve dull skin. I always wondered, though, as I threw away all those seeds...what if they are just as powerful as the surrounding fruit, and I'm wasting a bunch of a good thing? So I did some research...


It turns out that papaya seeds have incredibly strong antibacterial and anti-inflammatory effects on our digestive system AND on our skin. Hence, this simply, yet incredibly effective, healing face mask...


Papaya Seed Face Mask:

Papaya seeds from one papaya
4 chunks of the papaya fruit
1/4 cup honey
1/4 cup plain yogurt

Directions:

Blend all ingredient in blender until smooth (the papaya seeds will remain a little grainy). Apply to face in circular motions to stimulate circulation. Once your face is covered in the mask, let it dry for 20 minutes. Remove with cool water in circular motions.

Disclaimer: The first time I used a mask with papaya seeds, my face stung a little. It wasn't too bad, but it was enough for me to experiment to make the perfect papaya seed face mask. The yogurt and honey really balance out the potency of the papaya seeds. The yogurt especially is soothing in case you have sensitive skin like me and react to the papaya seeds.

Skin Benefits:

Papaya Seeds: Papaya seeds have intense detoxifying properties. They are also antibacterial and anti-inflammatory. When you rub the ground papaya seeds into your skin, it will give you that extra exfoliating factors to really brighten your skin. When taken internally, papaya seeds can help with liver detoxification, help prevent and treat food poisoning, and is antibacterial and anti-inflammatory in the gut. Studies have also shown evidence that papaya seeds can help treat E coli, Salmonella, Staph and other dangerous bacterial infections. Unfortunately, the seeds are not very tasty, so if you are thinking of using them in a smoothie--beware, the taste might be too much to handle.

Papaya Fruit: The fruit of the papaya contains antioxidants and vitamin A. The papain in papaya is naturally exfoliating and helps to remove dead skin cells. Because of this, papaya also helps fade scars and blemishes, as well as unclog pores and prevent breakouts.

Honey: Raw, unrefined, uncooked honey is one of the most convenient and effective natural ingredients you can use for your skin. Honey is antibacterial and anti-inflammatory. It moisturizes, brightens and softens skin giving it an otherworldly glow. The list of benefits raw honey has on skin is a mile long so I won't list everything here, but, I can tell you that for the past two months I have been washing my face with raw honey every morning and my skin has never looked better. I use raw, uncooked Manuka honey from Trader Joes. Manuka honey has more antibacterial properties than most other honey because it is made by bees who pollinate tea tree flowers. You can get it online here.

Yogurt: For face masks I use regular, Trader Joes Greek Style Plain Yogurt. I don't use non-fat and I don't use European style (it's too runny). Using yogurt with regular fat content is a lot better for your skin than non-fat yogurt. Let me just go ahead and list just some of the ingredients in yogurt that are great for skin: zinc, lactic acid, calcium and B vitamins. Zinc is anti-inflammatory, has mild astringent properties and helps to regulate oil which are all great for acneic or inflamed skin. Lactic acid is a natural exfoliant. It smooths rough skin and helps hydrate skin. It also helps prevent premature aging and discoloration. The calcium helps facilitate cell turnover. B vitamins helps skin to glow.

Thursday, July 24, 2014

DIY Detox Face and Body Mask

This face mask can be slightly drying but it great for pulling out deep-rooted impurities, getting rid of blackheads, drying out pimples and smoothing your skin. The batch I make is rather large since I usually use this as a whole-body mask. I will slather it on my face, back and chest all at once. You can cut the recipe down a little if you just want to use it for your face.

Ingredients:

3 Tbl Bentonite clay
4 capsules of Activated Charcoal
2 tsp Sandalwood Powder
5 drops of Vetiver essential oil (optional)
5 drop of Sandalwood essential oil (optional)

Directions:

Mix together clay and sandalwood powder. Carefully break open the Activated Charcoal capsules and mix with the clay and sandalwood powder. Slowly stir in water until it has reached your desired consistency. (I make mine pretty thick but if you want it to be a bit more gentle on your skin you can add water so that the mixture is a little thin.) Then add the essential oils and mix in. The essential oils are an added bonus but not a must. Then spread the mixture on your face and let it dry!

For a stronger mask: Substitute water for raw, unfiltered apple cider vinegar. This will double the mask's detoxifying power but be careful! This mask can also really irritate skin and make it more inflamed if you have breakouts.

Side  note: You will feel the mask pulling at your skin as it dries and it may also feel a little itchy. This is completely normal. It is also normal for your skin to be somewhat red and blotchy after you rinse this mask off. Don't worry. It will soon subside. Remember, not all masks are right for everyones skin type. If something doesn't feel right, go with your gut and remove the mask.

Sometimes, for the sake of time, I will quickly whip up a modified version of this mask with just the Bentonite clay and the Activated Charcoal and mix it with some water.

Bentonite Clay: I spoke about Bentonite clay in this post. It is 100% natural calcium bentonite clay and is incredibly detoxifying. It has an amazing ability to pull impurities from the skin. It also increases circulation to the skin. More blood flow means more healing when it comes to blemishes.

Activated Charcoal: This wonder ingredient has the ability to attach itself to dirt and oil in pores which leaves your skin refined and smooth. It's kind of the "it" ingredient in skin care right now but you don't need to buy an expensive face wash with activated charcoal when you can go right to the source--and it's not even expensive!

Sandalwood Powder: Sandalwood has anti-inflammatory, antiseptic and astringent properties making it ideal for people with blemish or acne-prone skin. Sandalwood powder is also great for fading scars. This has long been a highly revered ingredient for skin by people in India. You can find more face masks using sandalwood powder here and here.

Vetiver essential oil: This is one of my favorite essential oils. It's a powerful antiseptic and helps stimulate circulation to the skin and it has long been used to treat all types of skin conditions. I have found that, for me, it is one of the most effective essential oils to use as a spot treatment for breakouts. You can find one resource for all things vetiver oil here.

Sandalwood essential oil: Similar to it's powdered form, sandalwood essential oil is a powerful astringent with toning, antibacterial, anti-inflammatory and anti-aging properties. Unlike it's powdered form, sandalwood essential oil is highly moisturizing. Using it in this mask balances out the drying effect of the sandalwood powder.

Wednesday, March 20, 2013

the beauty gypsy

Have you all heard of The Beauty Gypsy?

If not, browse her blog--she is amazing and all of her posts are entertaining and filled to the brim with helpful tips and information.

Last week she did this post about how to deal with really huge pimples under the skin. I call them SUBMARINES. And yes, I had to write it in all-caps because that's how you have to say it. Pimples like this are not just submarines. They are SUBMARINES to the max. If you have ever had one, you know what I mean.

Anyways, last week, when The Beauty Gypsy did this post, also happened to be the week that I had a huge submarine on my chin. I barely ever get that type of cystic acne so I didn't know what to do. Needless to say, I panicked . . . and made it worse.

It wasn't until after I had made it worse that I saw The Beauty Gypsy's post. But after I read what she had to say, I wanted to make sure that if I ever got a pimple like that again, I would be prepared.

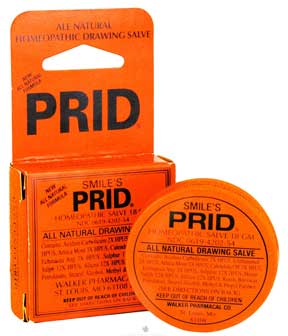
She suggests using Prid Drawing Salve on the stubborn cyst.


The cheapest I found was from WalMart for only $3. That's right . . . only three freakin dollars. Sounds like a bargain to me! The shipping costs more than the actual product. Which is why I ordered two...just to get my shippings worth! You can get a can here.

The Beauty Gypsy told me she uses this stuff all the time--keeping a can at her house, one in her car and one at her office. That was the tipping point for me. I thought this stuff must be close to magic if she relies on it that often and doesn't go anywhere without it!

I am excited to get my can in the mail. I will keep you updated and let you know how well it works for me. If you try it for yourself let me know how it works for you too! I'm curious to see how results will vary for different people.

On another note, I did something that I probably shouldn't have.


I bought these babies.
What do you think???!???! (seriously, what do you think...)
I really really like them. I know it's not everyones style, but I just love chunky boots.

It always scares me to buy things online. I hope that I like them in person as much as I do in pictures.

I'll let you know what I think when I get them!

Link for where I ordered them from here.

I have a lot of packages coming in the mail to look forward to! I'll keep you all updated.

Wednesday, March 13, 2013

bad news

I have bad news. Remember this post?

Well,  I saved up a little, splurged, and tried more MyChelle products . . . and they work.

Why is this bad you ask?

Because no lie, this stuff adds up! And now that I know it works . . . how could I possibly do without it!?

Here is what I got:


The Clear Skin Cleanser which you can find here.

I use this facewash at night before using toner, then the Perfect C Serum, spot treatment, then moisturizer. My intricate and time-consuming routine drives my boyfriend crazy, whoops! But anyways . . . I like this cleanser a lot. My skin is nice and clean afterwards but not dried out and so far I think it has cut down my breakouts--though it is hard to tell which product is doing the most work since I use a serum and a spot treatment too. 

One thing that bothers me: I seriously do not know why they call it "Youth Blemish Control". I would not consider myself "youth" anymore, but I still need blemish control! This is not a cleanser just for teenagers. The other cleanser I like is the White Cranberry Cleanser which you can find here.


Clear Skin Spot Treatment which you can find here.

Once again, this is not just for "youth".

I use this at night and in the morning (as needed). I always put it on after using serum but before moisturizer.

One reason I like this spot treatment is because, not only does it work to heal pimples fast, but also, unlike a lot of other spot treatments, it is quite easy to wear under makeup. Sometimes spot treatments ball up or flake off when you try to apply makeup, and sometimes moisturizer, even after it seems to have dried. If you have used spot treatments before I am sure you know what I am talking about.


Clear Skin Balancing Cream, which can be found here.

Even the people on the MyChelle website who write in reviews say they are "definitely not youth" and they "love" these blemish-controling products.

This moisturizer is an awesome, I mean, awesome, base for makeup. No primer needed. It just has a great matte finish that makes makeup look flawless. It helps control shine/oiliness through the entire day--my skin feels clean all day, not all gunked-up like it usually does by 3pm.

One thing is that you don't get a whole lot of moisture from this "cream". If you have dry skin, this might not be the best product for you. One thing I do to balance this out is I use the Clear Skin Balancing Cream in the morning, but at night I apply a heavier moisturizer. I prefer Neutrogena's Multi-Vitamin Night Cream because it doesn't clog pores but it delivers a lot of moisture. You can find it here. You can also find that night cream in Ulta or at Target.


Apple Brightening Mist, can be found here.

I use this in the morning after I have applied moisturizer, right before I put my makeup on.

Honestly, I could do without this product. I think maybe the Fruit Enzyme Mist, which can be found here, would probably be better suited for my skin. After reading the product reviews for the Apple Brightening Mist, I just really wanted to try it.

It's kind of sticky--too sticky--even after it dries. This is very annoying, which is why I find myself skipping it a lot in the morning just because it is not convenient to apply makeup right after spraying it on my face. It's just so sticky.

I thought maybe I should spray it before I apply moisturizer, but still . . . it just doesn't feel good on my skin. I feel like I have a layer over my face which makes it harder for my skin to breathe. Although that's probably all in my head, there is something to be said for the way a product makes you feel. I do not want to start the day feeling like I have a layer of gunk stuck to my face.


I wish I could work for MyChelle--that would be my dream job! Sadly, that will probably remain in my dreams only, but I would seriously be one of their best and most truthful advocates (-:

I hope you all found this info useful!
Let me know if you try any of these products--I would love to know how well they work for others too.

Saturday, March 9, 2013

Quick Tips: Enlarged Pores


Hey all! I'm so sorry I have not posted in forever. I have been completely swamped with school and work. Craziness! Here are more "quick tips" for those last-minute emergencies.

Are you looking in the mirror thinking, really? Why do my pores have to be the most clogged they have been in ages today of all days? Here are some quick fixes.


·         Tip 1: Exfoliate, Exfoliate (as far in advance as possible...)

o    SCRUB for a full minute with...

§  Baking Soda

§  Cornmeal (Warning: very abrasive!)

§  Sugar or Brown Sugar

§  Epsom salt

§  TIP: You can mix fresh lemon juice, tea tree oil, or lavendar essential oil with any of these scrubs for added benefits.

·         Tip 2:

o    Use toner, you can find my DIY toner here.

o    Use Raw Apple Cider Vinegar

§  Just pour on a cotton ball and rub all over your face, let dry, then moisturize.

·         Mask 1:

o    Egg Whites

§  Egg whites tighten pores and draw out impurities. Just whip up some egg whites and apply all over your face and let dry before you rinse it off.

§  TIP: To get an even deeper pore cleansing, add a few drop of tea tree oil to your egg whites before you apply to your face.


Something else that may really help is to dry brush your face. I'm sure you have heard of dry brushing for your body, but this can also really help cell turnover and exfoliation for your face as well.
 
Dry brushing is when you take a dry stiff-bristle brush and brush your whole body, in long upward strokes to help with detoxification and circulation. Dry brushing can help with cellulite and ripples in the skin. You always want to brush towards your heart. Once the skin is wet it is more sensitive and doing this while in the shower can possibly cause damage to the skin.
 
For the face, instead of a brush, I use an exfoliating glove like the one below. I rub it over my face in small circular motions.


TIP: You can also use this glove instead of a brush for dry brushing all over the body--it is a great exfoliator. I use it on my back and shoulders as well as my face. You can find these gloves at most drug stores. I found this one at a grocery store.  

Thursday, February 21, 2013

beautiful skin and saving the bunnies


A few months ago a Sprouts was built near my house. So of course, I went and browsed their beauty section.

If you don't know what Sprouts is, it's like a huge indoor farmers market--it resembles Whole Foods in the kinds of food it carries, but they are cheaper and have things like homemade "Sprouts" peanutbutter.

They have a huge selection of cruelty-free, all-natural, all-organic products for any and all of your beauty needs. But this is not a post about how awesome (but sometimes over-priced) Sprouts is.
I am posting because it was in Sprouts that I discovered a line of skin care products called MyChelle.
And I am nothing short of AMAZED.

Don't worry if you read this and want to try some of the MyChelle products but don't have a Sprouts near you (I don't know any other stores that carry MyChelle, maybe Whole Foods?)--you can get everything online on their website here, or also search for their products on Amazon.

Basically, all of the products I have tried have been more effective than anything else I have used and all their products are natural. Everything is non-toxic and derived from plants, extracts and plant stem cells AND they use renewable packaging. They are very eco-aware and put their knowledge about the power of nature into their products.

Also, the MyChelle packaging has the "cruelty free" symbol on it, and they say on their website that they are 100% cruelty free which I have been trying to pay more attention to. I have a bunny and it breaks my heart to think that there are bunnies out there being tested on, all for the purpose of human surface beauty. I am not going to go all righteous on you guys, but when you can, which I know isn't realistic all the time, please try to buy cruelty free products. No one can be perfect, but when we are faced with the choice between cruelty free and not, maybe trying our best to get the cruelty free product will help out at least a little.

Lola the bunny


If you want more specific details on MyChelle you can read more about them here.

I encourage you to browse their website. You can chat with a skin care professional, read every single ingredient in a product before you buy it, read customer reviews, and browse helpful articles and skin care tips. Like their products, their website is packed with good stuff and you get a lot out of it.

I have very fair, acne-prone, sensitive skin...not good combos.
This is what I use from MyChelle, though I want to try more!

White Cranberry Cleanser
I use this cleanser every night before I go to bed. This cleanser refines my pores and my skin is so much less oily but it is not dry either, which sometimes I have trouble with. I guess you could say I have combination skin--oily, but at the same time it can be dry and flaky. Yuck. I don't know how good it is at preventing blemishes, which is why I want to try the Clear Skin Cleanser to compare. You can find the White Cranberry Cleanser here. Also, the Clear Skin Cleanser that I want to try but haven't yet, you can find here.


Perfect C Serum

I use this serum every night before I go to bed and I have seen my skin do a 180. It does the most amazing things--most notably, practically rids me completely of acne. Whatever acne I do get is noticably less red and my pimples are much smaller. My skin is smooth, the texture is silky and it looks much brighter. It doesn't smell great, and I would suggest letting it dry for ten minutes before you go to bed, but the results are so so so worth it. I use it ten minutes after I wipe my face with the toner from my DIY beautiful skin toner post. You can find Perfect C Serum here. Also, with this stuff, a little goes a long way.


Clear Skin Serum

Last, but not least, I use the Clear Skin Serum every morning. I use this, then moisturize and then apply my makeup. It has made a huge difference in my skin. My skin produces significantly less oil throughout the day, and yet, at the same time, it is completely hydrated. This serum has detoxifying clay in it that helps to keep your pores from getting clogged and antioxidants to protect it from environmental stressors while simultaneously getting rid of acne. It's awesome, I just cannot say enough about it. You can find it here.

The other products I want to try are the Clear Skin Balancing Cream which moiturizes while also preventing acne, and also the Clear Skin Spot Treatment. Another one that looks enticing is the Apple Brightening Mist.
Clear Skin Spot Treatment
The only downside to MyChelle...now that I have made it all sound so wonderful...is the price.
Be prepared to spend a lot.
Is it worth the money? I can confidently say that it totally is after some consecutive months of usage. But I wanted to make sure it was worth spending the dough on before I told you guys about it.
This is also the reason why I have not tried all of the products that I want to try.
Also, Sprouts does not carry every single product, so some of these I can only get online. Some products you can get for cheaper on Amazon than the on MyChelle site.

Have a wonderful Thursday!

Tuesday, February 12, 2013

Quick Remedies: Breakouts

I will be doing a series of these "quick tips" to remedy different skin issues in a pinch. This week we are talking about breakouts and acne.

If you have any skin "issues" that you want me to talk about, comment below. I will do one on dry skin and also one on enlarged/clogged pores.

Party tonight? Wedding in 48...or maybe worse...24 hours?


I'm not going to lie and say there's a miracle cure, but these tips will definitely help!

Acne:

So you got a sudden breakout right before a big event? This tends to happen when you are stressed out about something. Stress hormones trigger breakouts! So, number one, try to relax. Can't do that? Ok here are some masks that you won't even have to leave your house to do (for risk of going into public with that massive pimple, maybe?). No time going to the store, because, after all, who has that kind of time in a crisis like this?
  • Mask 1:
    • One egg white
    • Ten asprin pills
    • 1 tsp baking soda
      • Whip egg whites together with a fork.
      • Add baking soda and whip in with egg whites.
      • If the asprin pills are coated, then one by one hold each pill under warm water and gently rub between your fingers until you can feel the slimy coating has mostly come off and the gritty asprin underneath is starting to be exposed.
      • Drop each one into the egg white and baking soda mixture and crush with the fork and whip together.
      • If the asprin you are using is uncoated, then hold all ten pills in the palm of your hand and run them under warm water for only about five seconds to start to break them apart so they are easy to mix in with the egg whites and baking soda.
      • Crush/mix/whip asprin in with egg whites and baking soda.
      • Smooth the mixture over you face and let sit for 20-30 mintues, then rinse off.
        • TIP: This mixture is difficult to get off your skin. I suggest using a really mild soap before applying the mask, and then using a more gritty or abrasive face scrub to remove the mask.
        • TIP: Depending on the egg you use, you may have more egg white or less egg white. Adjust the baking soda amount accordingly. Does it seem like you need more? Add a little more. The consistency should be pasty but not thick.
 Why??
Asprin naturally contains salicylic acid which kills pimples. Asprin can also greatly reduce inflammation and redness. It helps to apply asprin to painful pimples.
Egg whites have great healing abilities. They nourish, calm and also tighten the skin, restoring balace to blemishes.
Baking soda gives your skin a deep clean and gently exfoliates which can restore that natural glow to your skin.

    • Mask 2 (A spot treatment, for when you just have that one pesky/sore/inflamed pimple):
      • Three asprin pills
      • Two drops of Tea Tree Oil (OPTIONAL)
      • 1/8 tsp Raw Apple Cider Vinegar (also OPTIONAL...I explain below)
        • If the asprin pills are coated, then one by one hold each pill under warm water and gently rub between your fingers until you can feel the slimy coating has mostly come off and the gritty asprin underneath is starting to be exposed.
        • If the asprin you are using is uncoated, then quickly run each pill under warm water for only about two seconds to start to break them apart so they are easy to crush.
        • Add the raw apple cider vinegar.
        • Add the tea tree oil (optional).
        • Apply paste onto the pimple and leave on for as long as you can.
          • TIP: Sometimes all you have is asprin. Don't have the apple cider vinegar or the tea tree oil? No problem. Just warm the asprin up and crush them with warm water to make a paste and apply that to your pimple.
          • TIP: Don't have tea tree oil, but happen to have lavendar essential oil? Use the lavendar essential oil instead.
          • TIP: If you have a night before the event, sleep with the asprin paste on the pimple.
    Why??
    Asprin naturally contains salicylic acid which kills and dries up pimples. Asprin also greatly reduces redness and inflammation. It also helps if you have a particularly painful pimple.
    Raw Apple Cider Vinegar has great healing properties and also kills bacteria. It contains alpha hydroxy acid which can heal blemishes quickly.
    Tea Tree Oil is anti-bacterial and a great spot treatment used alone as well.
    Lavendar calms and soothes irritated and blemished skin.


    Thursday, February 7, 2013

    DIY Toner, for beautiful skin of course...

    Beautiful skin is healthy skin, and this toner is healthy for your skin.
    I love expensive skin-clearing/skin beautifying products just as much as the next girl, but I won't spend the money on an expensive toner that claims to work wonders because I can make my own that works just as many wonders as the expensive stuff does.
     I know because I have been using this toner for a while now and can definitely vouch for its awesome awesome skin results. Best part is that it costs close to nothing (especially compared to those so-called miracle toners I walk past in Sephora..yikes! $75? No thanks).

    The ingredients for this toner all together cost around $20. Best part though? You can make tons and tons of batches. So one bottle of toner ends up costing you less than a dollar.
    This toner smooths, brightens and clears your skin. I used it on my shoulders when they started to break out (which they always do in the winter!) and I saw huge results in the clarity of my skin in about four days. It works way better than the drying over-the-counter creams and even better, it doesn't bleach my clothes like the store bought topical acne medication.
    This stuff works, but one warning is that your significant other or roommate might not appreciate the smell...it has apple cider vinegar in it which has a really strong and not so great smell to it. But if you can tough out the smell, it will definitely be worth it.
    Also, if you put it on before you go to bed, the smell will wear off by morning.

    Ingredients:
    1oz bottle
    3 drops lavendar essential oil
    8 drops tea tree oil
    raw apple cider vinegar
    witch hazel
    hydrogen peroxide (optional)
    four drops lemon juice (optional)

    **Note: I used a one-ounce bottle. If you are using a container that is larger, just follow the recipe but double or triple it depending on the size container you are using.**

    First I put about three or four drops of the lavendar.
    Lavendar essential oil has soothing properties and helps calm blemished skin. It also helps to dull the harsh smell of the apple cider vinegar.


    Second I put around 8-10 drops of tea tree oil.
    Tea tree oil is an anti-bacterial and is good for clearing up blemishes and giving the skin a good deep-cleansing to get the grime out of those pores.


    Third, I put about a cap full of hydogen peroxide (this ends up being about 12 drops all together). You don't have to do this step. It isn't necessary and it's a great toner without the hydrogen peroxide. The reason why I put it in is because it is an antiseptic and also helps lighten sun spots and scars and it also is very effective at drying out pimples (which is why it is used in almost all over-the-counter topical acne medication).
    Some pople say it's good for acne, but some people say it wreaks havoc on your skin. It can be too drying for people with skin that has a tendency to be dry and flaky already. Don't use it if you have dry or really sensitive skin.


    Next is another optional step. I put about four or five drops of fresh lemon juice in with my toner. Lemon juice has a lot of enzymes in it so it helps to lighten acne scars and also brighten skin.
    If you are obsessed with being tan, don't use the lemon juice...or the hydrogen peroxide for that matter. Both of these ingredients will probably take away, or at least significantly lighten your tan.
    If you want to use the lemon juice, I would suggest making a small amount of toner at a time since it is a food and doesn't have a really long shelf life. If you are making a big batch, skip the lemon juice. You don't want your toner to go bad before you are finished using it.

    (Ignore the fact that the bottle is full in this picture...I took the picture with the lemon next to the bottle after I was finished making the toner.)

    Next, I fill the bottle 3/4 of the way full with raw apple cider vinegar.
    Make sure it says on the apple cider vinegar that it is raw, organic and unfiltered. Refined and pastuerized apple cider vinegar will not work the same.
    Raw apple cider vinegar is fermented and is loaded with so many great skin benefits. It helps the pH balance of your skin. It is filled with alpha hydroxy acid which helps with flaky or dry patches on skin, heals blemishes, and lightens age spots and sun spots. 
    People also claim that apple cider helps increase circulation to the skin. This is a claim that I am not 100% sure about, but if it is true, then that's awesome too! It is great to have around because it really works well as just a spot treatment if you have a pimple.
    People also drink raw apple cider vinegar to help clear up their blemishes from the inside out.

    (You can see here with a 1oz bottle about where I fill it to with the apple cider vinegar.)

    The last step is filling the bottle the rest of the way full with witch hazel.
    Witch hazel is a disinfectant, an astringent and it contains antioxidants.
    It is mild, so it doesn't dry out skin, but it is effective at cleansing and minimizing pores. It tones your skin while fighting acne-causing bacteria at the same freakin' time.


    Try it out and see how it works for your skin!


    Sunday, January 27, 2013

    Hollywood Secrets or Aztec Secrets?


    Soo this product sounds promising.
    Supposedly it is a "super-clearing mud mask" that vacuums out everything in your pores and can also be used as a spot treatment, literally sucking out pimples. Kind of gross but it gets my attention.
    Want to see the vacuuming action? Take a look at this picture...
     
     
    All of those little bubbles are said to be the gunk being sucked out of your pores.
     
    The only problem? It's $69!
    Needless to say I am definitely on the fence when it comes to buying this product, I need to be sure it is as awesome as it sounds before shelling out that kind of cash.
     
    I have read all of the Sephora reviews, and honestly, I have never seen so many five-star reviews for one product. I think pretty much every single person gave this product five stars except for maybe one person. You can check it out for yourself here.
     
    This mask came out of Hollywood and one of the big fusses about this product is so many movie stars swear by it. It is packed with tons of good ingredients for your skin and it utilizes this new PORE-MATRIX™ technology saying:

    "NEW PORE-MATRIX™ Our Activated-X Charcoal is an Xtreme absorption carbon, attracting toxic substances into its mass up to 500 times its volume from all skin types, within the deepest & toughest areas. Our new proprietary K17-Clay™ will better extract & encapsulate excess sebum oils, bacteria & toxins in a controlled stasis state, revealing a Pore-Matrix™ of extraction dots & areas, ready to be washed away for seemingly poreless skin."
     
    If you want to read more about it, please visit Ivory and Olive's review on this product here.
    They go into even more depth about the ingredients in this mask and how it came about.
     
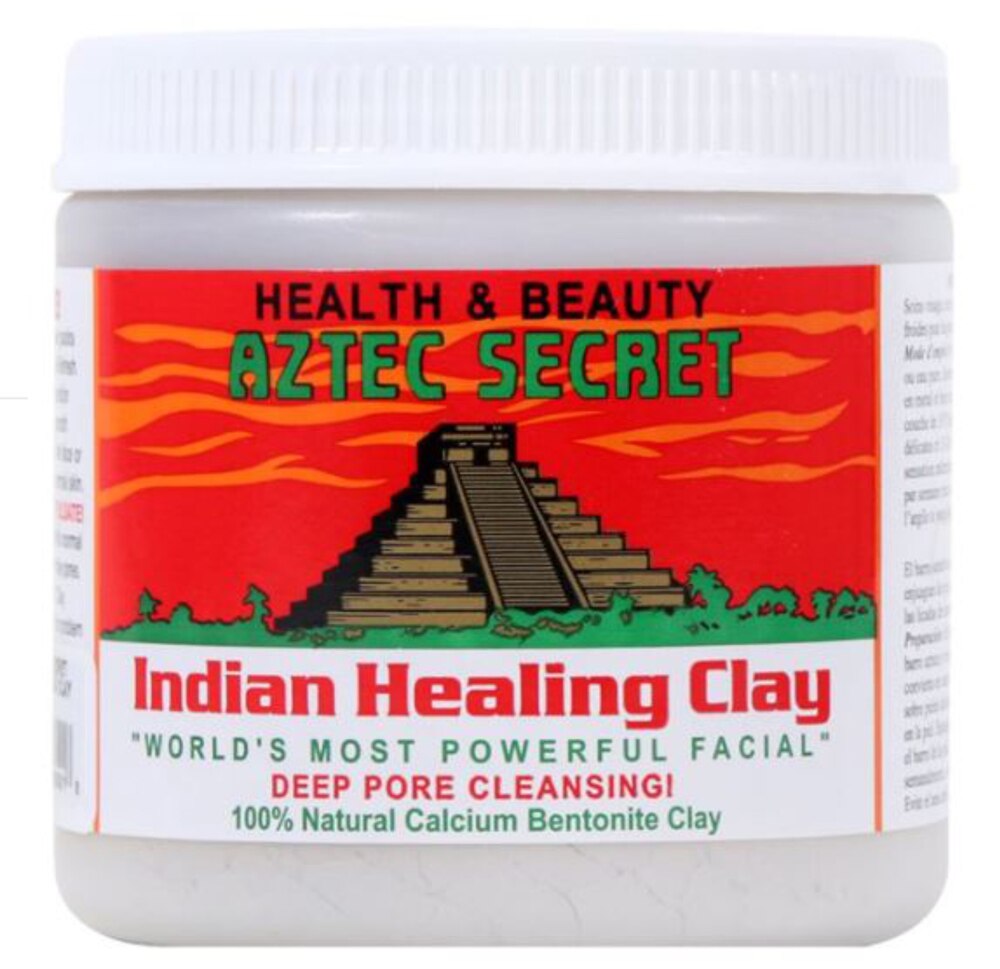
    Now, one reason I really really hesitate to go grab this product, even the sample which you can check out here,  (even the sample packets are a lot of mulah), is because I use this super magnetic Aztec Secret Indian Healing Clay mask that suctions everything out of my pores. It deep cleans and detoxifies and also improves circulation to your skin. The best part? It is only about $6 for a huge 1LB jar of it! The GlamGlow at $69 per jar is not even one pound.
     
     
    I usually mix some of this clay with some raw apple cider vinegar (which works wonders for skin even on its own) and put it on my face and back until it dries completely--you will know when it is dry because the skin on your face is being pulled by the mask. It works wonders. It detoxifies and clears and heals.
     
    It does not, however, contain all of the wonderful ingredients that GlamGlow clay has, but it is natural and it works, so do I really need all that extra stuff in the GlamGlow mask?
     
    I mean, it does sound enticiing, but I am not sure that it is really necessary to drop $69 v.s. $6 if the difference in results are not going to be that huge.
     
    Most of us really have no choice--we simply cannot afford the $69 little jar of supposed skin miracles. If you are in that boat, then definitely try this Indian Healing Clay. I think that it is a great, very cheap alternative/substitution for the expensive stuff.
     
    This is the back of the jar.
     
     It is normal for your skin to be a little red or flushed for about a half hour after you use it, but a week goes by and suddenly your skin it starting to looking glowy and clear.
     
    If you have really sensitive skin, do not mix it with raw apple cider vinegar, mix it with water instead. You choose the consistency of your own mask--how thin or thick you want the mask to be, the ratio of water or vinegar you use to the clay--thin masks will be a little more gentle.


    You can find this Indian Healing Clay at really any health store around. I have even seen it in a few drug stores like CVS. I get mine at Sprouts but I am sure they have it at places like Whole Foods and New Leaf. If you cannot find any near you, you can order it online here. Here is also a link to the organic apple cider vinegar I use by Bragg.
     
    Don't buy this jar for more than $8 on Amazon, that would be a rip off. I bought my jar for only $4.95 at Harvest House on Monument in Concord, CA.


    Hope this helps for all you ladies on a budget, yet drooling over those little jars of GlamGlow like me!


    Tuesday, January 22, 2013

    Blemish Powder

    EyesLipsFace (ELF) has this Mineral Blemish Powder that I use every single day. It is awesome.

    On the actual ELF site this product has mixed reviews, like most products, but I personally give it five stars. It in no way claims to be a concealer, so it doesn't have a lot of coverage and is very sheer. BUT it fades pimples and makes them less red and it is perfect to wear underneath any foundation/concealer. I feel like it almost creates a pimple-fighting barrier between my skin and my foundation when I wear it.


    Sometimes if my skin is looking pretty good, or I am camping in the summer, I will wear it alone. It goes on looking very natural.

    Best part?
    It has TONS of awesome ingredients in it that give your blemished/acneic/oily skin great benefits.

    Kaolin soothes irritated and blemished skin and helps to heal.
    Willow Bark helps prevent acne and naturally contains salycilic acid.
    Tea Tree Oil is an anti-bacterial and keeps pores clear of dirt and grime.

    You can get ELF Mineral Blemish Powder here.

    One of the great things about the ELF website is that every product has a video to go along with it. It shows you how to best use the product and also gives you a full list of ingredients.

    Do I sound like a walking ad for ELF? Sorry!
    But I have found that being a girl on a budget, ELF is such a great website because everything is just so dang cheap compared to other places. You get the most bang for your buck! Target carries some of their stuff, and sometimes so does Grocery Outlet, which is nice because then you don't have to pay for shipping, but sadly, I have not found the Blemish Powder in Target yet.

    Anyways, pretty much all of the beneficial ingredients in the ELF Mineral Blemish Powder, you can use to make your own really great acne-fighting concealer. Refer to my post here. And also here for more info on the ingredients.


    The one thing that the ELF Blemish Powder has that I don't use is Sulfur. Sulfur is beneficial for acne-prone skin, but not great for sensitive skin because it can be very harsh and irritating.

    Hope all is well!

    Monday, January 14, 2013

    bareMinerals Review: To Glow or Not to Glow

    I have no problem saving up for a little while to fork out more cash than I usually would for a product that is going to give me amazing results. This is why I always read every review I can find on every website I can find before buying a product as expensive as this one.

    Now, it may not seem that expensive at only $35, but when you do the math...it turns out that without tax, each glow "pad" is exactly $.58. Uhh, that's a lot! that's over fifty cents per pad. So the question was, is it really worth it? Is it really as miraculous as all of the reviews say? I had to find out for myself.

    bareMinerals Intensive Glow Pads (if you cannot see on the picture) say on the box, "advanced formula, for vibrant skin". Pssh! Hell yeah I want "vibrant" skin!

    So I went all-in. I used these glow pads religiously every night for two months...without the crazy miraculous results that most of the reviews boasted.

    What these pads did is really lighten my skin. I already have practically alabaster skin so it is hard to believe, but what I thought was impossible came true...my skin became even lighter! So if you are looking for a lightening treatment, these definitely do the job. The problem is that these pads claim to be a "brightening treatment" which in my mind is a little different than lightening. Lightening whitens your skin while brightening is supposed to give your skin a luminous appearance.

    When you read the ingredients in these pads, it seems like a bunch of awesome exfoliating, acne-fighting, nutrient-rich, anti-oxidant and anti-aging products all rolled into one super-product that is free of synthetic dyes and other common ingredients that are not good for your skin. Lactic acid and glycolic acid are two of the main ingredients. Glycolic acid is great for acne and blackheads while lactic acid is a natural exfoliant that can be found in milk (which historically has been used as a luxurious skin treatment--great for at-home face masks...I will talk about this later). The pads also contain lemon extract which is great for acne as well as lightening skin tone.

    The pads are actually pretty awesome. There is a bumpy side for more intense exfoliation and a smooth side. I would usually use the braided side first and then wipe the smooth side over my face. But both sides were great and felt like they were really exfoliating my skin.

    I don't want to say that I am completely disappointed with this treatment, but it did not give the magical results I was hoping for. My skin was not much smoother than usual, I didn't break out less, and my skin had bouts of luminosity but that was not as intense as I had hoped. Mostly, it just made my skin even whiter than it has ever been before. Perhaps my expectations were just too high, which is always a recipe for disappointment.

    Bottom line, if you are obsessed with being tan--do not use these on your face, it will erase signs of ever having been tan in your life. If you have mostly problems with oversized pores and not really any acne, this is probably a great skin treatment for you.

    One little tip is that you have to leave your face alone for about a half hour or so after you wipe the pads on your face, then you can follow with moisturizer. But it takes a really long time for the tackiness to go away and the formula to sink into your skin.

    Interested? You can get bareMinerals Intensive Glow Pads Brightening Treatment here and here.