Sunday, December 30, 2012

One Tip to GLOW

 
So one secret, or maybe it isn't necessarily a secret, but a little hint to get glowing skin is one simple ingredient:
Turmeric 
 
This wonderful spice is anti-inflammatory and an antiseptic.
 
 
This is the brand I use because it's organic, but any brand will do.
 
So there are so many DIY face masks out there. One popular and very simple, but effective, face mask is raw honey, nutmeg, and cinnamon. This is an awesome mask that disinfects and exfoliates--but add tumeric and you get even more of a glow effect.
 
One face mask I have posted about consists of honey, plain yogurt and raw apple cider vinegar. This is another great mask that can be made even better by adding a few shakes of turmeric.
 
In India, a traditional mask for brides before they get married uses turmeric because of the intense glow that it can give your skin.
 
Normally I would not direct you to a dr. oz website, I don't know why...it just doesn't seem right, ha, maybe that's just me! But I think this website here has some good information and also another great face mask using turmeric--it tells you the traditional turmeric paste that Indian brides put on before their weddings.
 
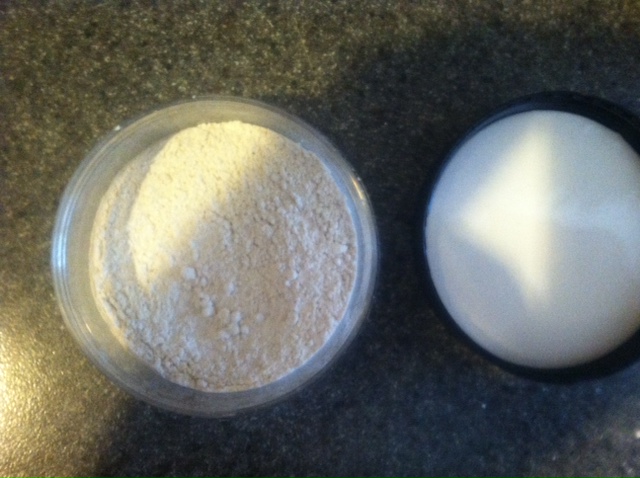
I have also heard of girls putting a 1/8 tsp of turmeric into their liquid foundation to get that glowing color. I tried this by dumping a little liquid foundation into my palm and mixing a dash of turmeric powder with it, but it was a little too orange for my skin color, but I may have used a little too much turmeric powder. Also, I have super light skin coloring. As in porcelain, which means that it will look very different on different skin tones and I could see how this would look great on someone with slightly darker skin, more yellow skin tone, or just has a really great tan going on!
 
Disclaimer: Turmeric dyes! So be aware if you want to try this that it does dye your sponges and if you wipe it on a towel, that color is probably not going to be washed away any time soon. Just make sure that you have completely rinsed off your face mask before you go to dry your face.
 
Happy GLOWING days and have a wonderful NYE!


Tuesday, December 18, 2012

Something Lovely for Your Tuesday


Today Begins the Week of Her Birthday

And I will bring her oranges, and a parasol,
And a poem on a letterhead.

On Tuesday
I will be empty-handed.

Wednesday I will bring her rice, and a dream
And peonies, and a knowledge of Italian.
And study her ear.

Thursday I will stay away.

Friday she will beam and put my
                       hand over her heart to hear it beat
                       and serve me rice and kiss my ear.
I will give her one wish.

On Saturday I will go barefoot to her
And dance her Greek dances
And let her see my love
In its place.

On Sunday she will be older
And we will cry and eat oranges
  Under our parasol
For the whole world to see.

                                     --Daniel J. Langton


Article on my dear professor Dan Langton:

http://ahundredyearsold.com/danieljlangton

Sunday, December 16, 2012

DIY Lip Stain

 
Hey all, so I definitely have not perfected the DIY lip stain, but as I experiment more I will keep you updated!

For now, though, here is what I know when it comes to making your own lip stain...and yes, it is very cheap, like most of my projects!

I use two ingredients:

Cherry KoolAid
Petroleum Jelly (Vaseline)


So this was one of the most complicated DIY projects I have ever attempted...maybe I was just having an off day...because I hear other people talking about how they tried this and had no problems at all.
 
First of all, I used way more than just one packet of red KoolAid, which is why I just ended up getting a big tub instead. I kept experimenting with packets and it took way too many packets. It was more economical for me to just get a tub of it, but of course, that is a lot of KoolAid that you might never use if you don't drink KoolAid.
 
What I did was put about
 
Two Tablespoons of KoolAid
 
and mixed that with barely any water at all--just enough water to bring the color out of the KoolAid--so about

1/2 teaspoon of water
then I put about

Three Tablespoons of Petroleum Jelly
into the microwave just to make it warm
 
Be careful!!! It is so easy to microwave it too long!!! Like ten seconds or so will do, depending on your microwave.
 
Then I added the KoolAid/water mixture to the petroleum jelly and mixed vigorously for a good five minutes--this is truly how long it takes to get the two to mix in well together so that they are blended and there are no chunks of KoolAid. If it seems too watery like the petroleum jelly is sort of in a puddle, add more KoolAid in 1/2 tsp increments until you have reached the desired consistency.
 
Then you get...


So not the most precise operation in the world, but it works! Let me know how it goes...


Friday, December 14, 2012

Christmas Give-Away!

 
Color of Emotion is doing a Christmas give-away!
 
It ends 12/15/12 at midnight. For details and to enter, visit the Color of Emotion Facebook page here. To enter, "like" the Color of Emotion Facebook page, go into the photo album titled "Christmas Give-Away" and comment under the specific photo of the item that you want to win. You can also visit their website here.
 
 
Come on, who doesn't want this for free??


Happy Holidays!


Thursday, December 13, 2012

DIY Lip Plump

 
Alright girls, so we like our lips to look nice and puckery (is that even a word?)...you know what I mean...but lip plumping tubes and such are usually a bit expensive. Sooo here is what I like to call the college girl's lifetime supply of lip plump formula. It is only two ingredients, you ready?:
 
1) Petroleum Jelly


2) Cinnamon Essential Oil


Let us reason here. So let's say that one tube of whatever lip plumping formula you buy is on average around $8-$10. I think that is a reasonable assumption. And let's say that you go through two tubes a year. So that is not that much a year. BUT with these two ingredients, buy them both and you are saving because they will last you at least two years, but probably even three if you use them sparingly. You are saving even if you go through only one tube of store-bought lip plump a year! Any generic brand petroleum jelly (a tub of it) is around $3.00. And a bottle of Cinnamon Essential Oil is on average $8.00. I buy mine at Sprouts, but I am sure you can find it at Whole Foods or any other health food store around. A little bit of cinnamon oil goes a very, very long way.
 
And then, a little jar, perhaps from makeup that you have used up already. Or, you can always go to Michaels! They have trays of little jars like the jar shown below for pretty cheap, which is unusual since I would argue that that store is pretty expensive most of the time.


I like my lip plump to be very potent, so I put a little more cinnamon essential oil than I am recommending here:
 
Mix approximately
2.5 teaspoons of petroleum jelly
with about
7 drops of cinnamon essential oil.
Mix them really well, and there you go!
You have a great lip plumping treatement, and A LOT of ingredients to spare--like three years worth of refills!
 
Usage: I would recommend putting this on your lips at the beginning of doing your makeup. Your lips will tingle a little, probably start to become a little numb. Then, by the time you are done applying all of your makeup, the lip plumping action has done its work and you can wipe it off gently with a clean towel and apply your lipstick or lipstain or lipgloss onto perfectly pouty lips (and moisturized lips too, I might add).


Oh what magic, and it is so simple!


So let's say that you have just read this whole post, but you are still not convinced, and would still rather just buy some lip plump treatment for cheap. Ok. Here is what I recommend:
 
 
This E.L.F. Prime/Plump duo is only $3!!! Since it is a duo, you do not get a lot of either the primer or the plumper, but I really do like the plumping end, and it will last you at least six months.  I am not a huge fan of the primer though. You can get this lip duo here.
 
I hope you all got something out of this post! Let me know how making the lumping formula goes. And sorry this post is so late! I had to celebrate a little with my girl Shannon with some pizza for finishing her last final of the semester! (-:


Have a great night and a lovely Friday!


FYI and DIY Lip Plump


Everyone reading this blog, please note that I in no way claim to be a professional expert on skin or makeup. I am a regular working college girl on a budget who has obsessed for enough years to know a thing or two and is simply just passing that information along. It is up to you to decide what DIY projects you want to pursue and I always encourage you to do your own research and discover on your own. This can only further information wealth--please share whatever you find, this blog is about sharing knowledge--even conflicting knowledge, because that's when we learn the most (-:


Stay tuned for tonight's post on the girl-on-a-budget DIY lip plump--just like the store-bought stuff but way more bang for your buck!

Tuesday, December 11, 2012

DIY Face Powder / Mineral Veil

As promised, DIY Mineral Veil/Face Powder...
#1 Arrowroot:  This natural product is light and smooth and is really great to use as a finishing powder. While it does absorb oil, it does not dry out skin. This ingredient is safe and gentle and ok to use on sensitive skin--better to use for sensitive skin than cornstarch. BUT if you do have sensitive skin, I ALWAYS recommend doing a patch test first to make sure. Try also to always use ORGANIC products on your skin.

#2 Kaolin: Kaolin is a product that is used in so much face makeup. It has really great covering ability and also absorbs oil. It is really great for acne prone skin because it can help to clear up break outs and also to sooth skin that is irritated. It also refines pores...wow, the more I talk about it, the more I realize this is just a great mineral! I always get my supplies from the cosmetic supply webite www.makingcosmetics.com. The are not over-priced and they seriously have everything you could every think of wanting when it comes to makeup ingredients.You can get a bag of kaolin here. A little goes a very, very long way. Really, all you need to buy is the 4oz bag.

#3 Mica: Mica is seriously in everything--from face makeup to eyeshadow to lipstick. You can get mica powder here. Remember, again, a little goes a long way. Mica powder is a texterizer and helps to aid in making the powder adhere to your face and in making the different ingredients adhere to each other. Simply put, it prolongs the staying power of the powder. There are tons of color options when it comes to buying mica. For face makeup, buy the translucent powder. Be careful--you don't want to accidentally buy green mica powder..that is, of course, unless you want to try also making your own eyeshadow (-: .


SOOO there are the very basic ingredients I use to make finishing powder, but, if you click on the website (www.makingcosmetics.com) and start to browse all of their products you will definitely be VERY VERY OVERWHELMED. Or perhaps you will start to get extremely excited about creating your own makeup--I was both. But these are the basic ingredients. Nothing fancy.


I use a mortar and pestle to combine all of my ingredients, but it is not necessary. If you do want a mortar and pestle, you can get one here.


To be honest, I do not have exact measurements when it comes to making my mineral veil--each batch is slightly different. This is difficult to pin-point because it depends on how much you want to make and various details like that. But I can tell you a rough estimate:
for about every
 
3 teaspoons of arrowroot powder
I use about
1 teaspoon of kaolin
and 1/2 teaspoon of mica powder.

I hesitate to tell y'all measurements because I think that it is good to experiment and find out what works best for you--but remember that you can always add more, you cannot take away an ingredient once it's added. Measurements will also vary depending on what kind of skin you have. If you have very acneic skin (hi, me) then you are probably going to want to use more kaolin than others.


I usually use left-over, empty jars from buying makeup, but you can buy powder containers for your own makeup here.

Let me know if you have any questions, and, as always, let me know how it goes!!!


DIY Mineral Veil

Ever gone to the BareMinerals stand in the mall, or in Sephora, and picked up a little jar of mineral veil and almost peed your pants because it was way too much $$??

Well, if you are like me then you don't have tons of money to spare, but you care about your skin and you also want to look good.

Many people will tell you to look at the back of really any mineral face powder and you will realize that mostly what is in it is cornstarch. Sure, for very cheap you could fill up an empty makeup jar with cornstarch and see if it works well for you. But, I have done a lot of research, and what is much better to use on your face is actually Arrowroot starch/powder. It will melt better into your skin and not leave so much of a white shadow on your face like cornstarch will. It is also better for your skin and better at absorbing oil.

Tonight I will be doing a post that is all about herbs and minerals that are good for your skin and very easy to get your hands on. Making your own high-end face powder is so easy to do you will not believe it, and it ends up costing you much less in the long-run.You could be making your own face powder very soon. Stay tuned to find out how! The end result looks like this:


Wednesday, December 5, 2012

Miracle Face Mask

Need a miracle? Not a holiday miracle...but a skin miracle?
Hate to break it to you, but that probably won't happen. I know, I have wished very hard for a skin miracle before. BUT I swear by this face mask. It is amazing and works so well.
Ingredients:
(equal parts)
Honey (raw)
Apple Cider Vinegar (unfiltered/raw)
Plain Yogurt (any brand)

Mix these together really well so that the honey is not in one clump and put it on your face. If you feel like you need more of one ingredient and less of another that is fine, just experiment until it's the consistency that you want it to be. It will be sticky and it is also liquid so it will feel like it might drip off your face, but it will dry pretty quickly into a thin film.

Leave it on for about ten minutes but start timing it after the liquid dries. You could leave it on for a little longer if you want to. Then just rinse off with warm water.

Use raw honey and apple cider vinegar. Without being raw, honey does not retain its antibacterial properties.

Try it and let me know how it goes! Use once or twice a week. I bet your skin is glowing after two weeks of use. Plus it's so easy! The ingredients are right in your kitchen.


Tuesday, December 4, 2012

Highlighting and Contouring

Soo...HAC (Highlighting and Contouring)...These pictures are just to show you the difference it makes. Sorry about the bad lighting! This is the only camera I have right now, and currently the only lighting in the house that is even remotely ok for taking picture. Yes, I look a little worn...I've been at work all day, can you blame me?
 
Before:
 
 
After:
 
 
So this is St. Lucia HAC duo from E.L.F. which you can get here. All you have to do is sweep the blush over the apples of your cheeks, then the bronzer right beneath that, just right underneath where your cheek bone juts out, along your hair line and under your jaw bone. I have some highlighter along my brow bone and my upper cheek bones.
 
This will be so much easier when I have a camera that can take videos...then I will just show you instead of explaining it all to you. BUT for now, you can watch demonstrations on how to do HAC at Cara's blog maskcara.

Hello There and the VS Fashion Show

Hello everyone and welcome to my blog! I decided I need an outlet because my head is filled with all of these obsessions over makeup and beauty products...why not share all that knowledge and get other peoples opinions at the same time?

Sooo, the Victoria's Secret Fashion Show is tonight. Don't tell me you didn't know! Yeah, well, I didn't realize it was that time again until yesterday either...oops!

I have conflicting feelings about the VS show. First, immediately after watching it I always feel a little down about myself (who wouldn't after sitting next to your boyfriend who was just glued to the TV for the past hour?) BUT, then, a few hours go by...maybe a day...and the initial "OMG I will never look like that EVER" wears off, and I sort of want to TRY to look somewhat like them. It makes me want to feel pretty even more (now that I have my boyfriends attention again...I have motivation to keep it!)

I am an avid reader of Cara's blog maskcara which you can read here. She always has great tips about VS beauty. One of her main tips is to  HAC (highlight and contour). It is one of those really great, but so simple makeup tips that can make a really huge difference.

When it comes to highlighting and contouring, I have had a lot of trouble finding the right colors to HAC with. I absolutely love E.L.F, you can visit their website here. They now have a HAC kit which comes with the blush and the bronzer perfectly matched to get the right HAC shades. And even better...it's only $3! Which is waayyy less money than if you were to buy the blush and bronzer separately.


I have very pale skin, so the shade that I use is called St. Lucia (pictured above). Get it here. They have two other shades that I hear also work just as great on different skin tones. I also have very sensitive skin and this powder does not irritate my skin at all.

I will post before and after HAC pictures soon!

Ya'll have a wonderful day and don't let those Victoria's Secret models get ya down--you are beautiful. You have to remember most people in the world do not look like that. I have met some really gorgeous people and the most beautiful people I have ever met look nothing like Victorias Secret models! Beauty comes in all different forms.